Introduction
Bearings are subject to wear like any other part of a Motorcycle, however they are under considerably more strain and therefore should be replaced at least every 10 years from my experience. Before you can begin to remove your old worn out wheel bearings and replace them with new ones you need a few basic tools, somewhere clean to work, some bearing grease and paper towels.
Bearing Removal
Bearing removal is a fairly straight forward task with almost any Classic Japanese Motorcycle. A hammer and drift tool (long steel rod) being your most basic tools. Since most bearings are retained with a circlip that you compress inwards, having a compressing style circlip removal tool will make that task easy.
If your doing a full rebuild, and have the wheel hub separate to the rim then you can take advantage of using a shop press to re-install new bearings, if you wheel is laced and not being stripped or you need to replace the bearings in an alloy rim then a hammer and some sockets (or better yet a proper bearing installation tool) are all you need.
Tools
- Hammer – Wood or Metal style, does not matter.
- Drift Rod – Needs to be around half the diameter of the inside of the wheel bearing. I use a socket extension handle as a drift.
- Circlip Pliers or Small screw driver if the retaining component is a sprung wire.
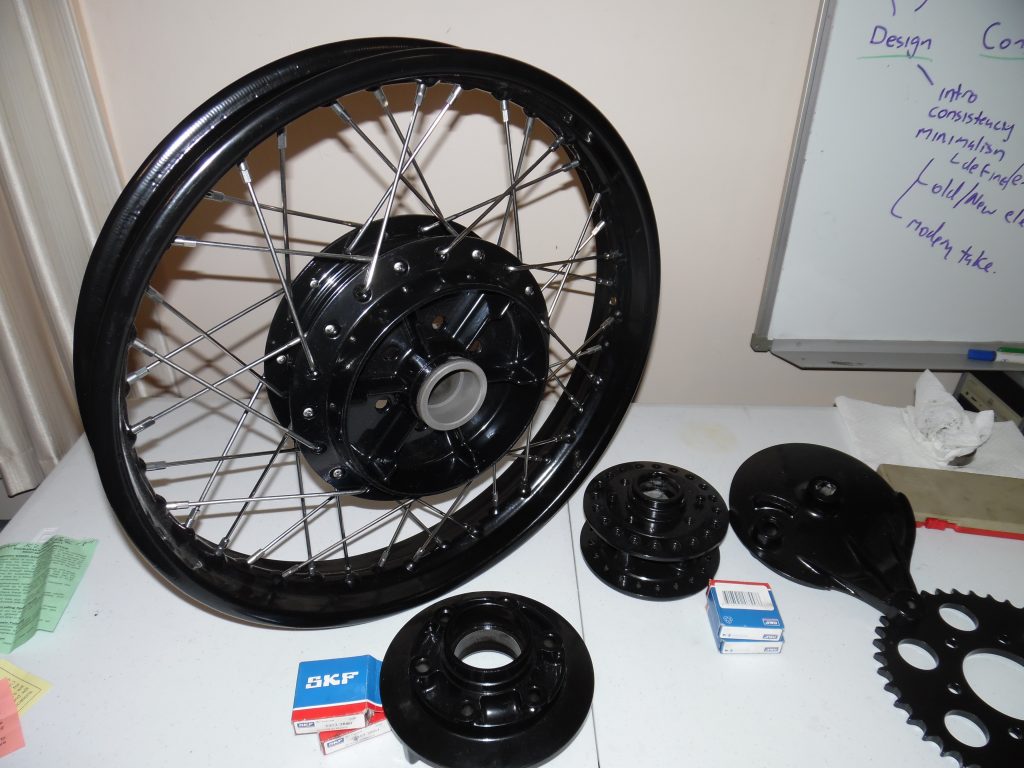
- High Temp Wheel Bearing Grease – Used for Re-assembly
- If you have just the hubs separate to the rim then a 6Ton Shop Press is VERY handy to have.
- Cleaning rags

Parts
- Wheel Bearings!
- Dust Seals (if needed)
Before you Start
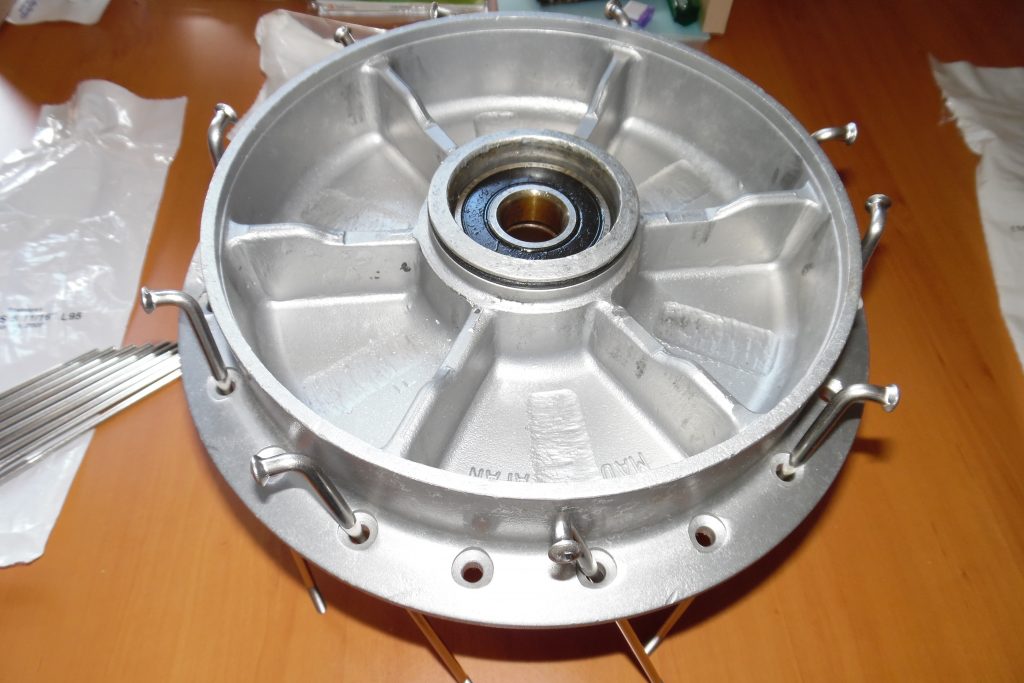
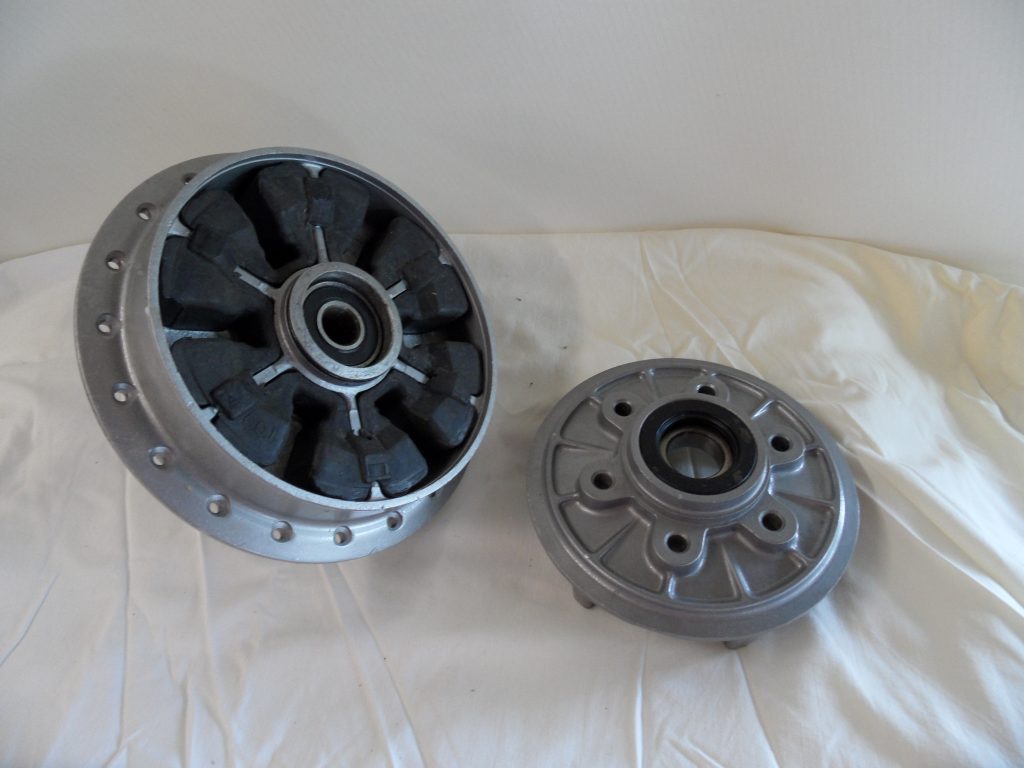
Generally in most Classic Japanese Motorcycles there are two wheel bearings per wheel that take the load of the bike via the axle. Keeping these bearings at the correct distance apart is a spacer inside the hub. And to make it more precise, one bearing is retained by a circlip and that bearing sits inside a machined opening so its retained against the hub and by the circlip.
The other bearing is then pressed in till it stops against the inner spacing and its held by friction from another component be it a machined spacer or Speedometer drive. Your wheel may have two circlips and be retained differently, you will know when you pull it apart!

Bearing Removal
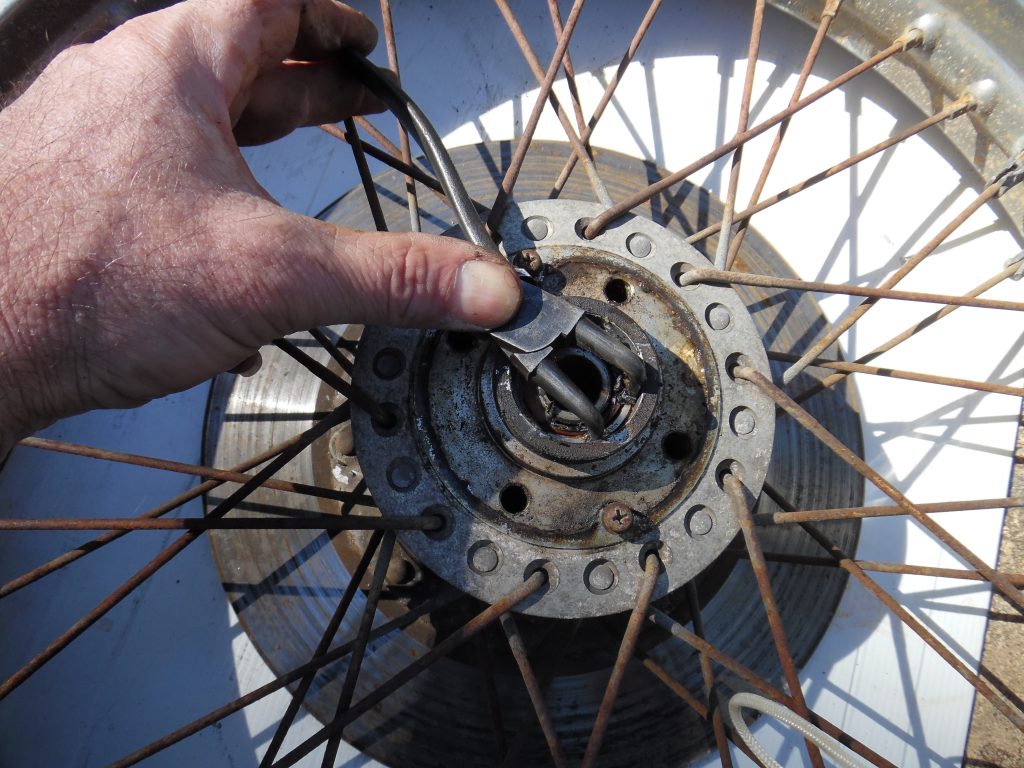
Assuming you are replacing a wheel bearing in a wheel just removed from your motorcycle, the first task is to remove and clean the dust seals. gently clean up the dust covers to remove any grease and dirt buildup. Dust covers are usually sprung loaded to apply pressure to the axle. These were used prior to fully sealed bearings being common place.
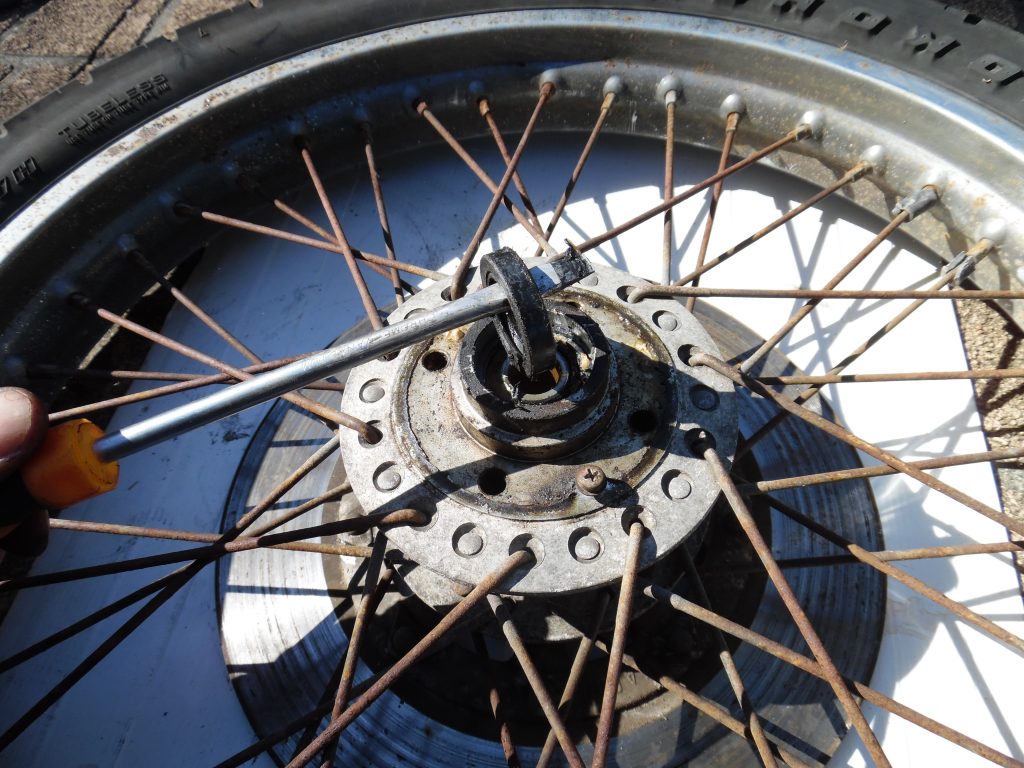
Lay the dust seals on a clean sheet of paper and note which side they came off using the speedometer drive as your guide. Next, locate the bearing retaining circlip or spring clip. There is usually one (1) retainer on one side and the other side is often held in place by the speedometer drive.
Lay the wheel on a flat surface with something to protect the metal surfaces so they don’t get scratched. Two block of wood of equal height should be placed under the wheel hub so the bearing can be driven out cleanly. Avoid laying the wheel on concrete and try to tap out the bearing.
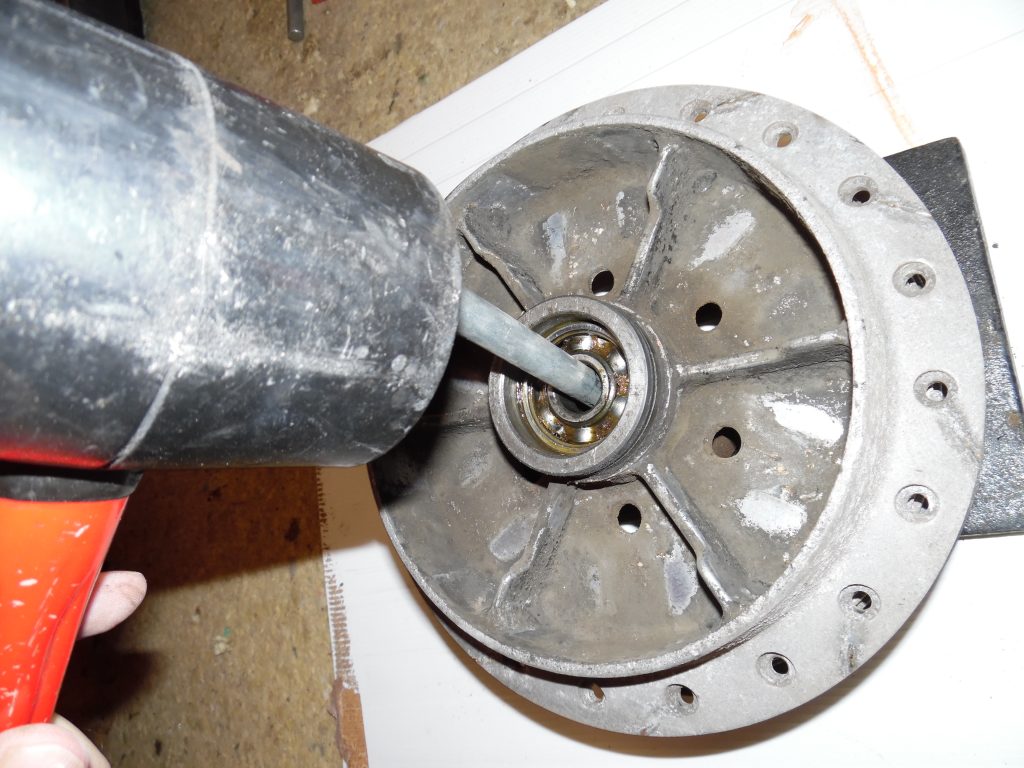
With the Hammer in one hand drift in the other and slide the drift down inside the inner whole of the bearing where the axle runs through and press it against the lip of the opposing bearing, tap it a few time gently and rotate the drift around about 45 degrees and tap again, do this all the way round to apply even force to the bottom bearing.
Lift the wheel and check if the bearing has moved, you should be able to feel it start to pop out as you apply force to the drift. The bearing should be moving downwards a few millimetres at a time. If its moving out, great, keep tapping till its out.
If the bearing is not moving, double check its not interfering with a hidden retaining ring or its been damaged in a prior removal or poor installation attempt.
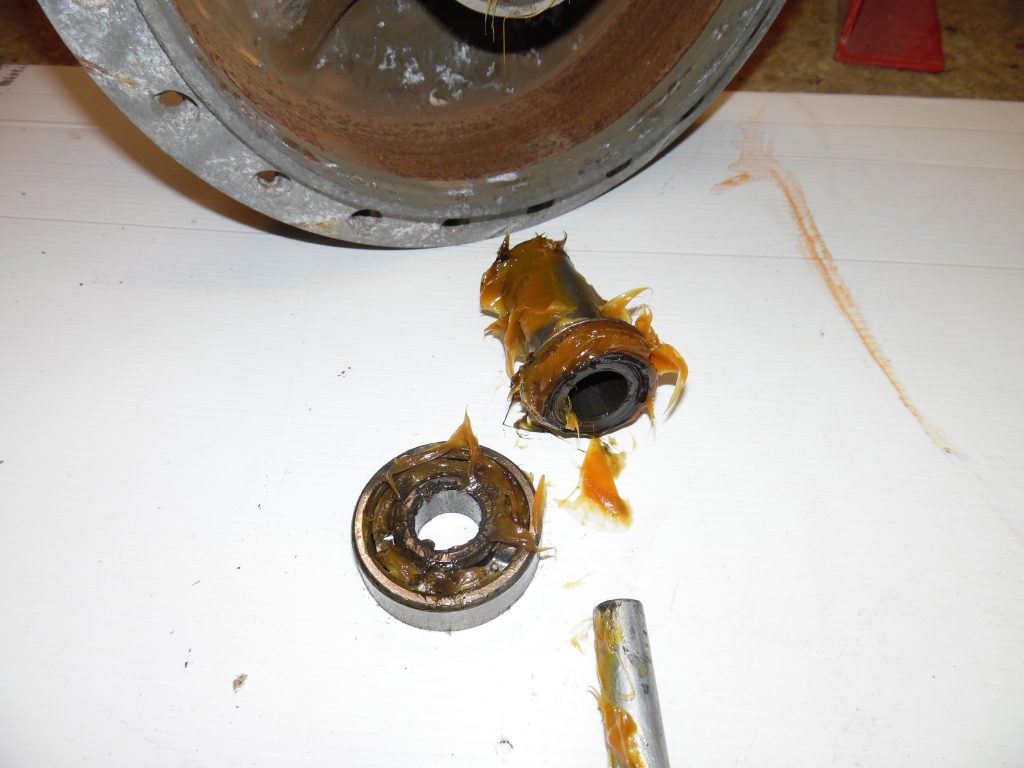
When the bearing does pop out it will most likely also reveal an internal spacer that sits between the two bearings, grab it and sit it with the dust seals, note its orientation.
Now flip the wheel over and tap out the other bearing, it should be easier with no inside spacer present.
Clean up ALL the surfaces and inspect for damage.
Bearing Installation
The installation process requires the primary bearing to be installed first, it’s the one that seats against the inside rim and is retained by a machined lip in the hub, the circlip retains the other bearing (in most classic Japanese bikes).
Pressing it in is best done using a special tool that sits on the outside rim of the bearing allowing you to tap or press the bearing in evenly. To assist installation I use a very light smear of grease on the inside surface of the hub that the bearing is going to sit in.
Once the primary bearing is in, fit the spacer and then carefully press the remaining bearing in till it stops against the spacer. When in doubt, refer to a parts manual for your model, just in case the spacer is missing.
Bearing Information
<To be updated in due course>
| Front | Rear | Sprocket Carier | |
| Kawasaki z650 | 6203-2RSH | 6303-2RSH | 6305-2RS |
| GPz900R | 6302-2RSH | 6303-2RSH | 6206-2RS1 |
| GPz1100B | |||
| z1000A2 | |||
| CB750 | |||