For a while now my 1994 zx9r-B1 has been leaving a spot of oil everywhere I parked, in fact it started to leave a lot of oil!
The cause has been oil leaking past the oil seal for the clutch push rod. On the B1 the clutch is hydraulic, so there is a slave cylinder similar to the older GPz900R and this is used to push a steel rod which separates the clutch plates. When the bike is on a lean, oil can flow along the rod when the seal has failed.
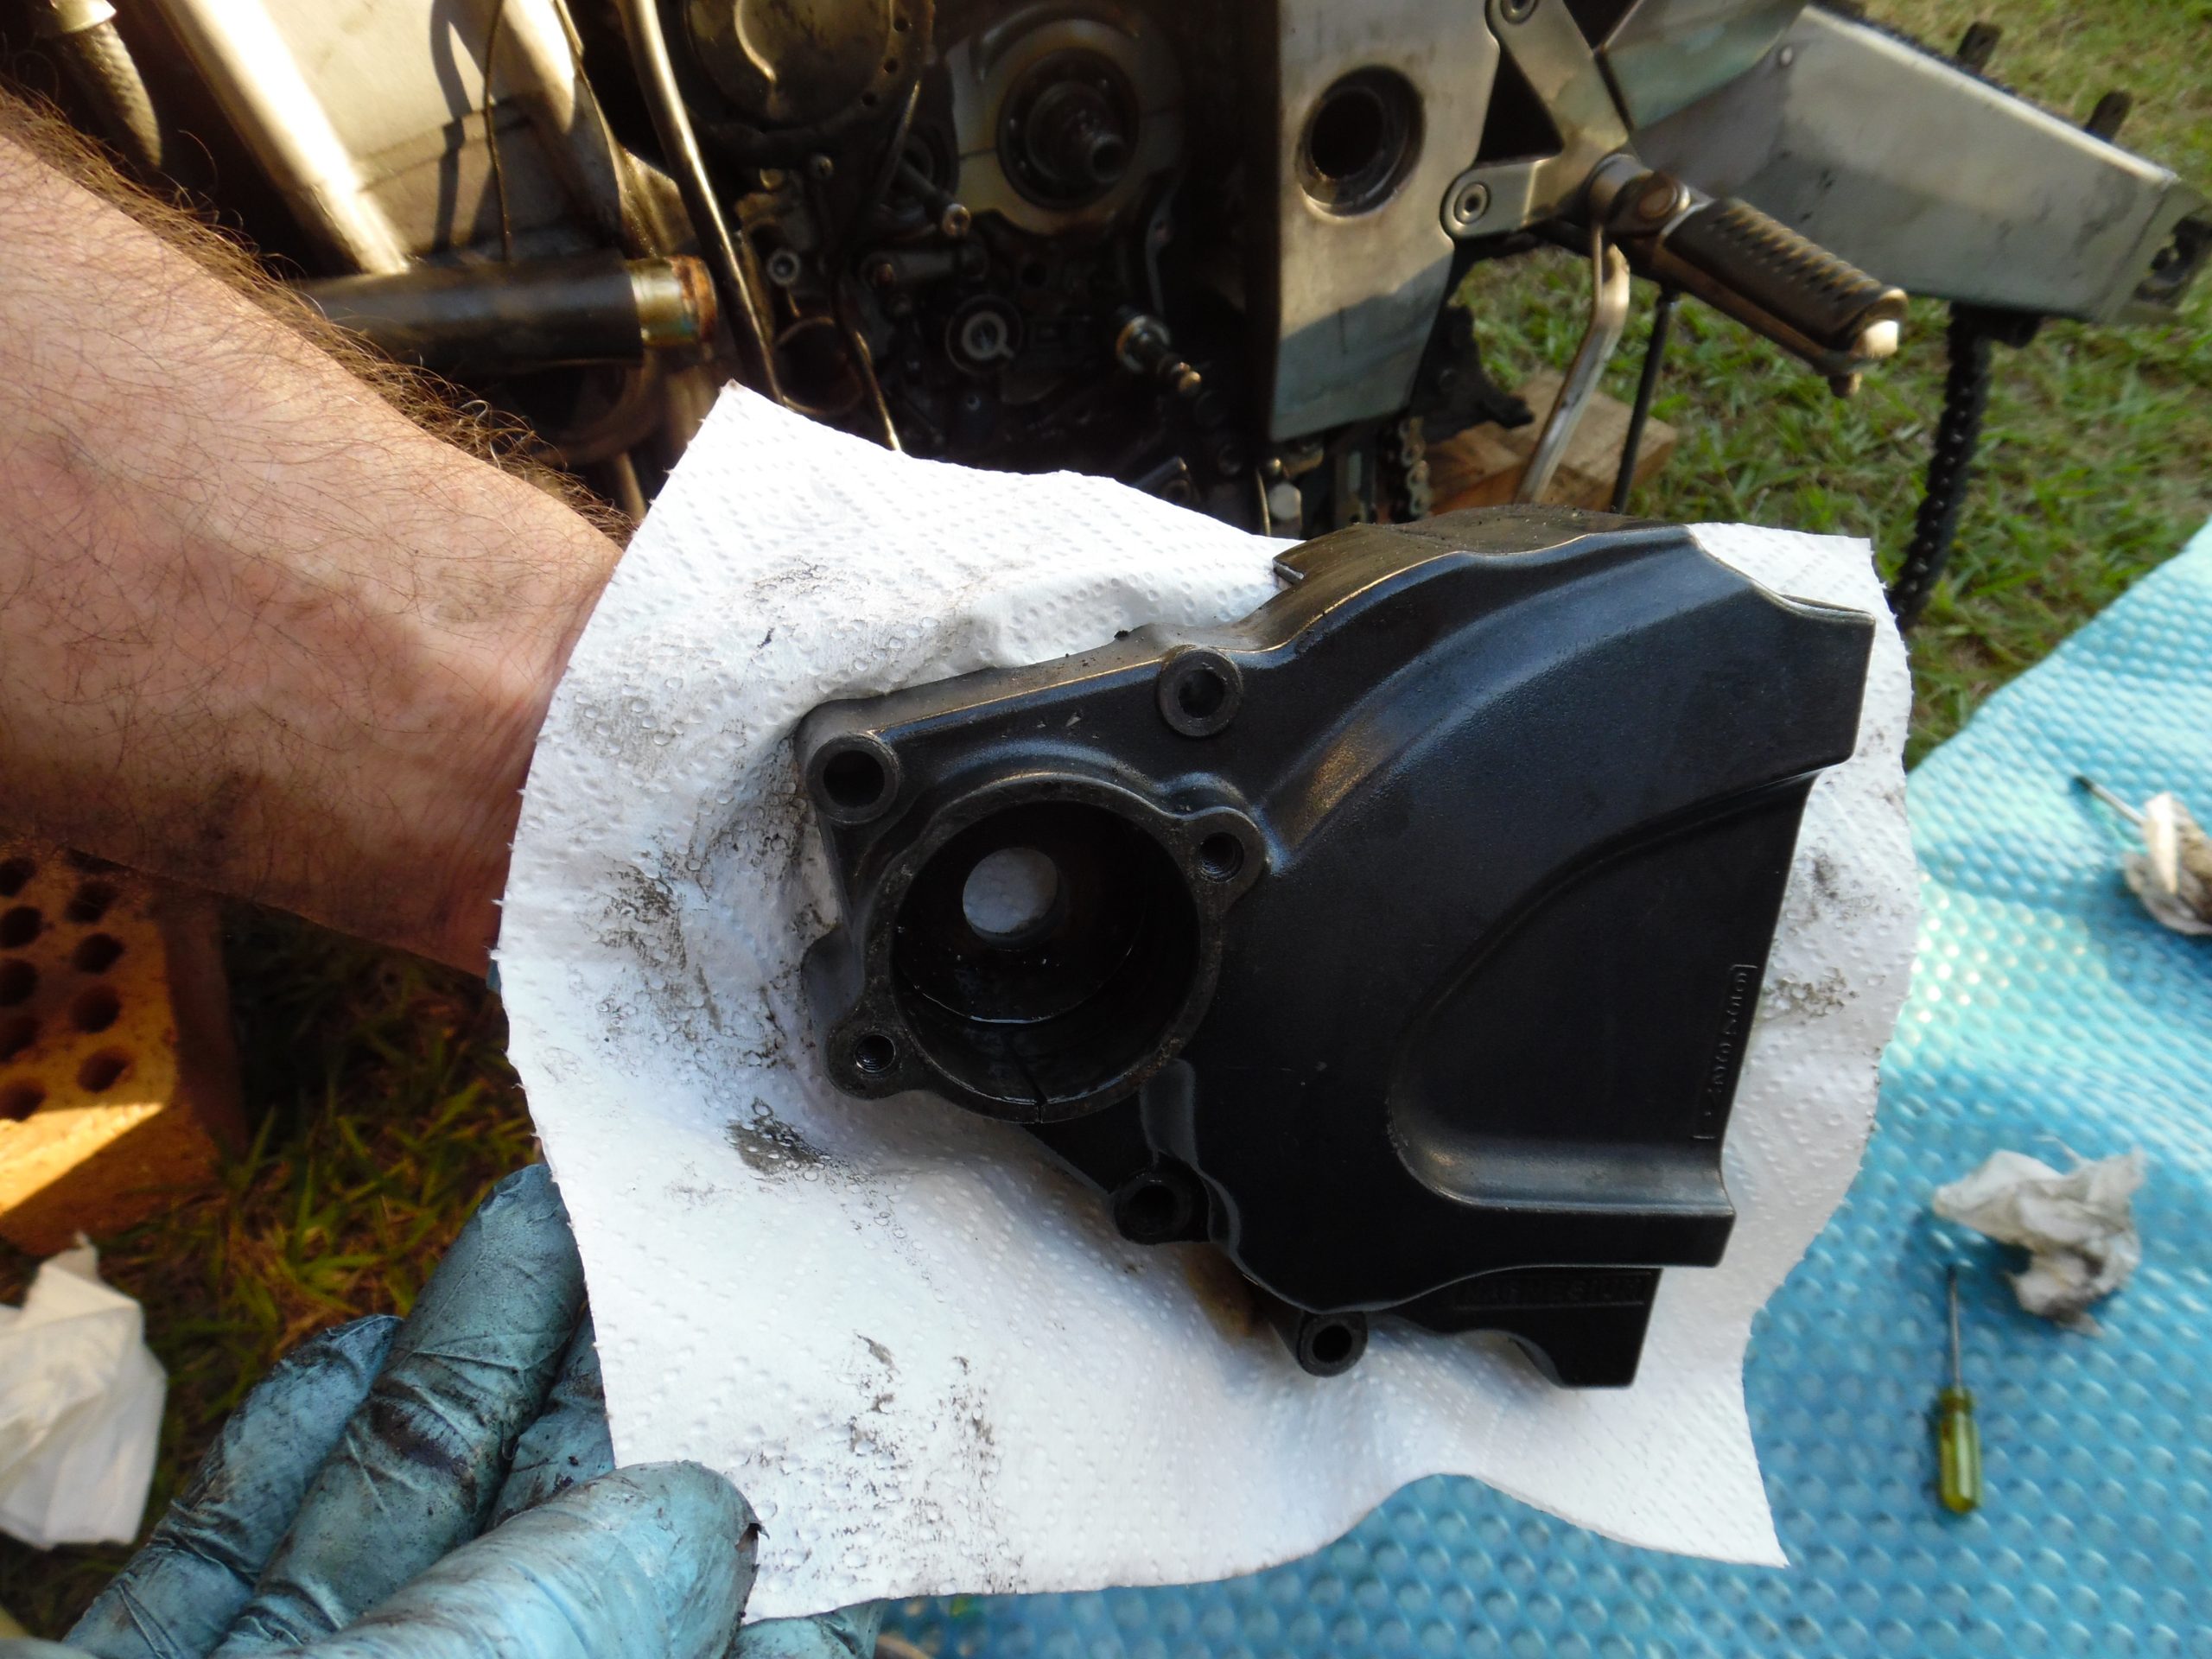
Unfortunately, to replace the seal you need to remove the transmission cover and remove the seal from behind. Below is a picture of the cover freshly removed (complete with oil and grease 🙂 ). Looking at the back of the cover, the clutch push rod seal has obvious damage.
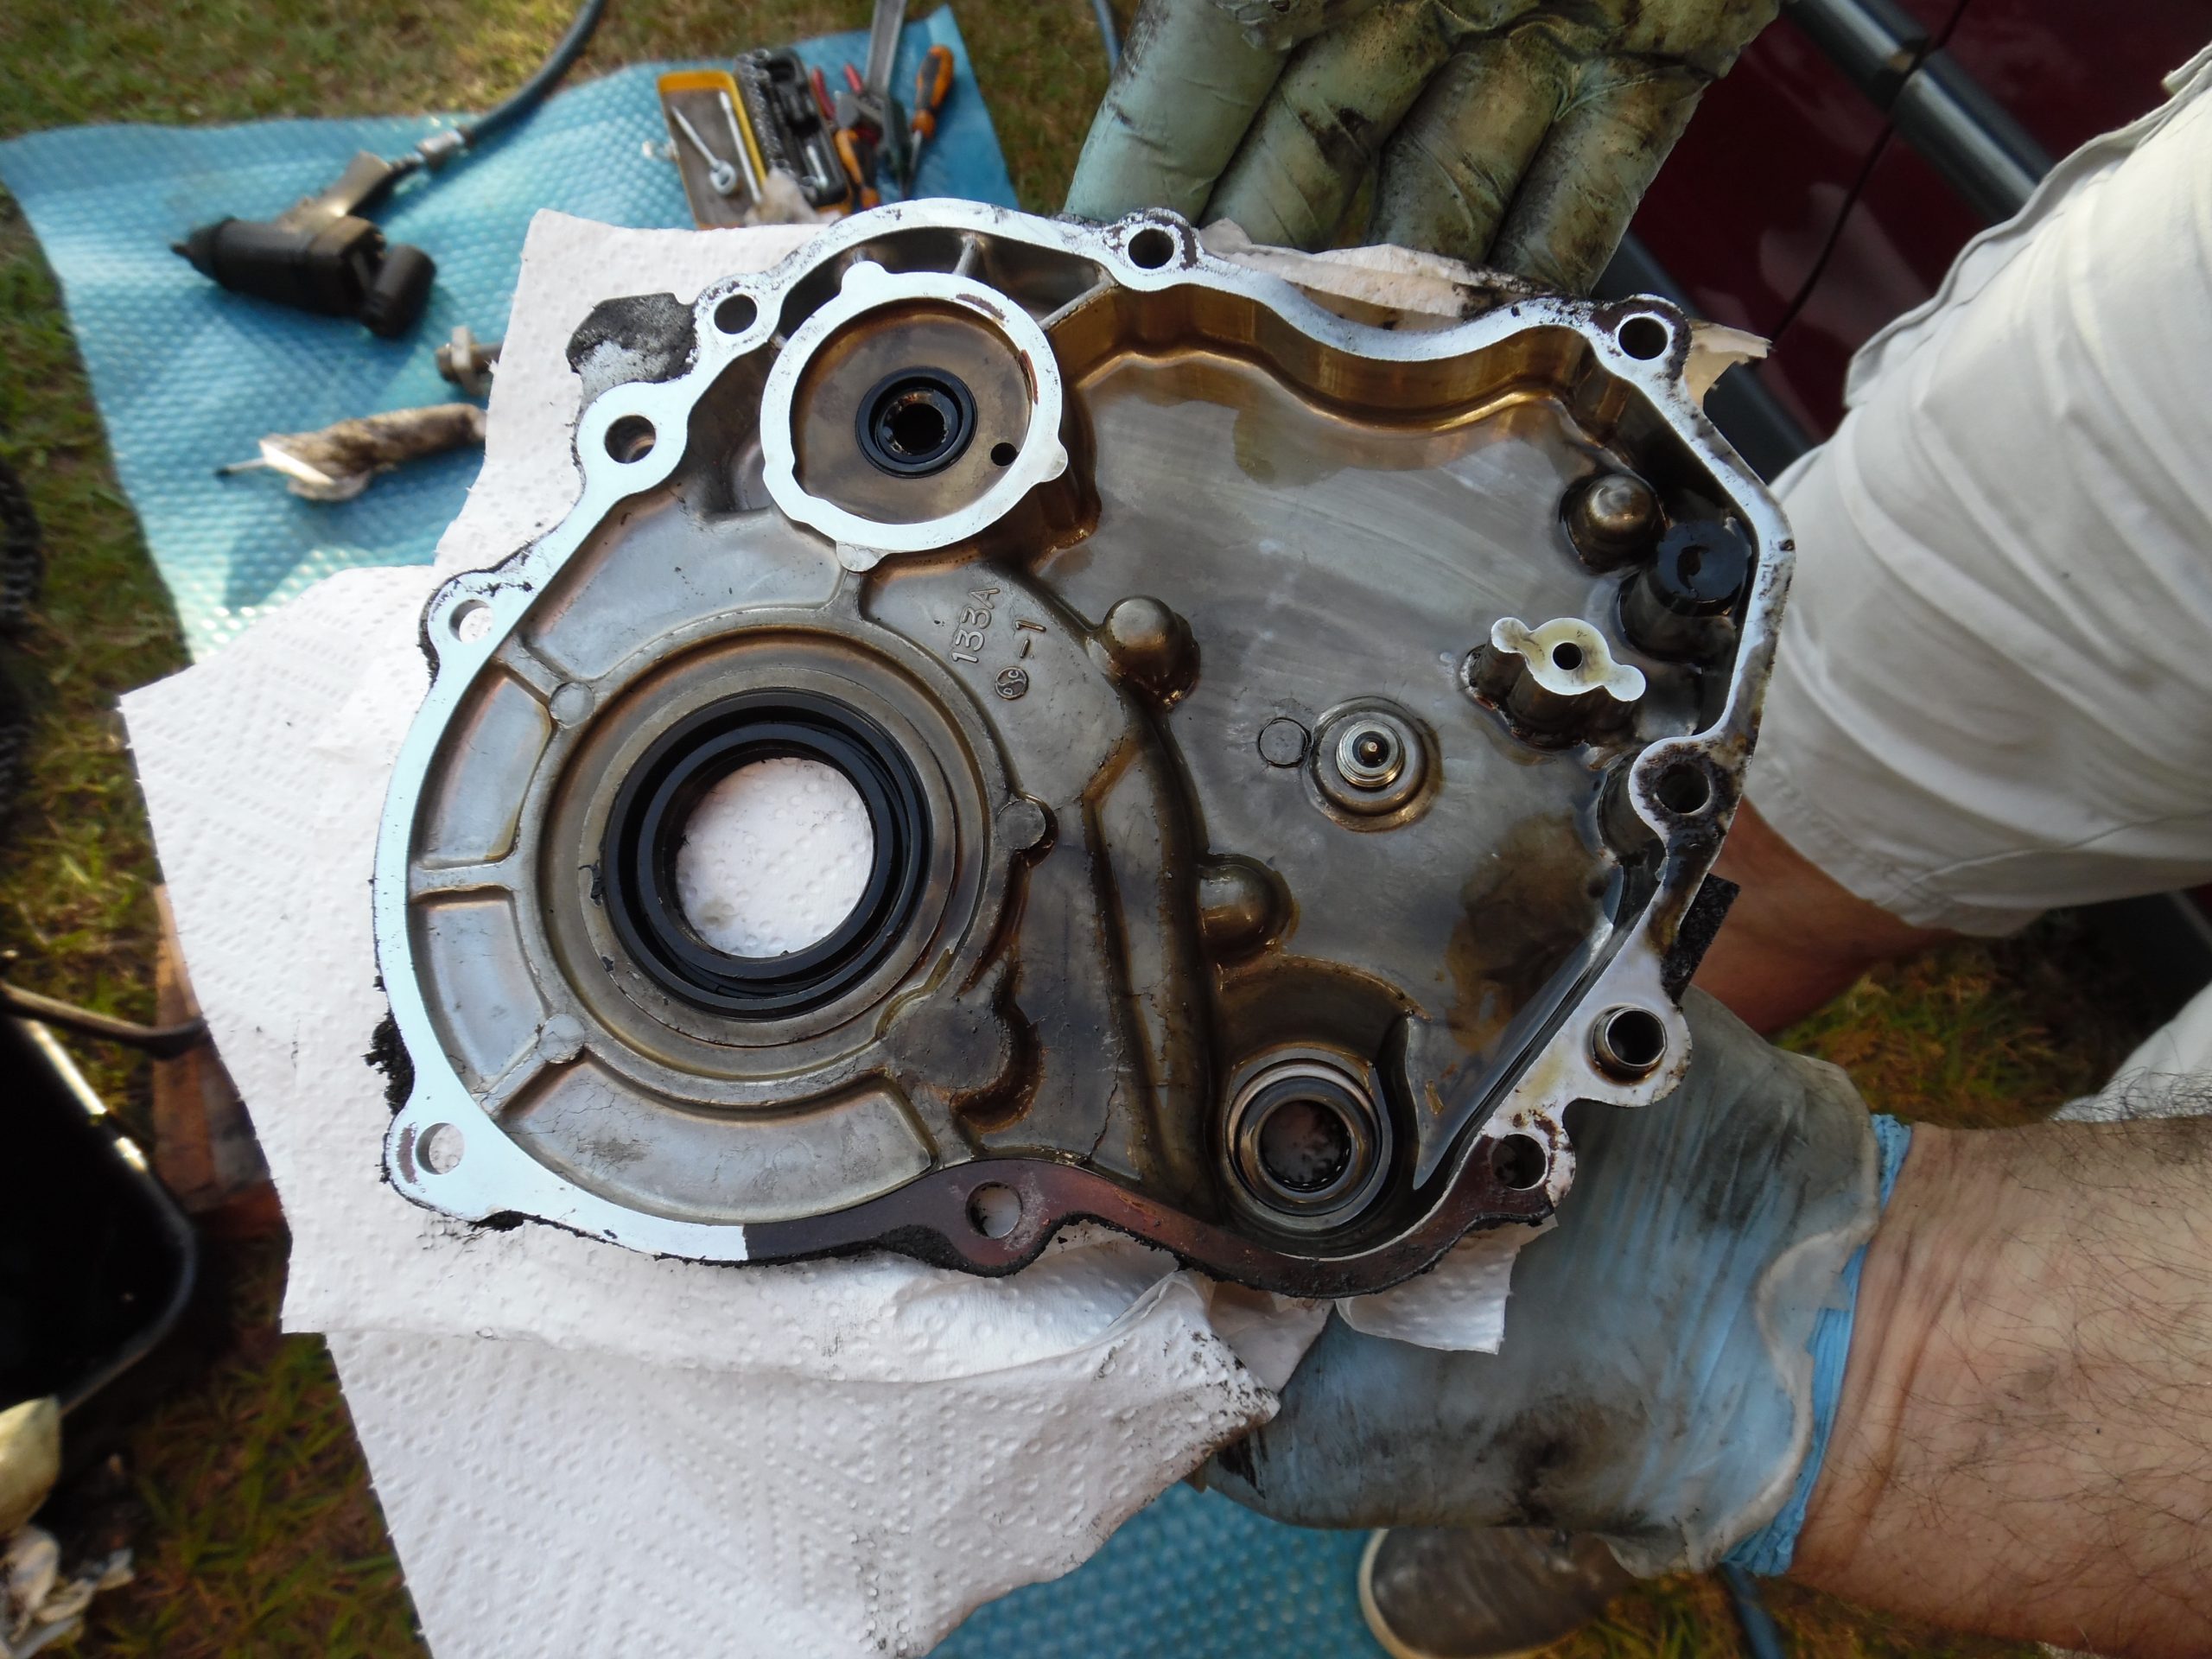
While the cover is off, you should also replace the output shaft seal (that’s the big seal) and the seal for the gear selector shaft (bottom right).
Getting Started
Tools
It’s kind of obvious you will need tools to do the job, but rather than itemize a list, just assume if you don’t have all the common tools, such as a socket set, spanners, screwdrivers then you wont be able to do the job. In addition to the common tools, an impact screwdriver is required to get the recessed screws out of the case.
Parts
You will need to order and have on hand the following parts:
- Output Seal – Should be Kawasaki Part # 92049-1361 (please check first).
- Oil Seal – 92049-1017 (This is the push rod seal).
- Oil Seal – 92051-005 (Gear Change Oil Seal).
- Gasket, Transmission C 11060-1660
This particular bike is a B1 model from 1994, the B2-B4 should be the same or pretty close. Later models will be different, my 1998 C1 model has a cable clutch and actuates directly on the clutch cover (I will check later models and update here accordingly).
Your very first task will be to remove the Left Hand side lower fairing piece so you have clear access to the engine covers. You will also need to jack up the bike and stabilize it.
Remove the Chain
Before you begin, check your chain and see if it has a joining Link. When I last replaced my chain I riveted it back together so there was no joiner. Normally this is the ideal way to go on a high horsepower bike! But in this case, the chain fowls the transmission cover removal so I needed to remove the swing arm so the chain would free the cover.
If your chain has a removable joiner, then remove the chain first. Otherwise, be prepared to unbolt the swingarm later.
Drain the oil
One of the first tasks to do is to drain the oil, I like to warm up the bike before an oil change but since we are actually working on it the added heat is not welcome.
Undo the sump plug and drain the oil into a suitable container. If you dont drain the oil now it will leak out when you remove the engine covers.
As this was the first time i’ve replaced these seals on this model bike, I removed all four set screws holding the water pump and undid the hose clamps. This resulted in the pump body separating, which did give me a chance to inspect it and replace the coolant on re-assembly.
If you want to keep it all intact, locate the two set screws that hold the pump down and remove just them.

Removing Bits
The first components to remove (in any order) are:
- The Water Pump;
- The Clutch Slave Cylinder or
- The Gear Change Mechanism
The water pump has four set screws, two secure the cover, the other two pass through into the transmission cover. You need to remove those two. The picture above was the result of all four being removed.
Pull the pump house free and secure it back.
After you remove the water pump you need to remove the clutch slave cylinder, it is also held down with two set screws. Then, remove the gear change clamp, you don’t need remove all of it, just the part that attaches to the shaft shown in the photo below.
Chain cover
Once the above items are removed, you should be able to remove the chain cover. When I pulled my cover off it was filled with a thick oily dirt mixture as is the transmission cover under it. I used petrol to clean it and then put it aside.
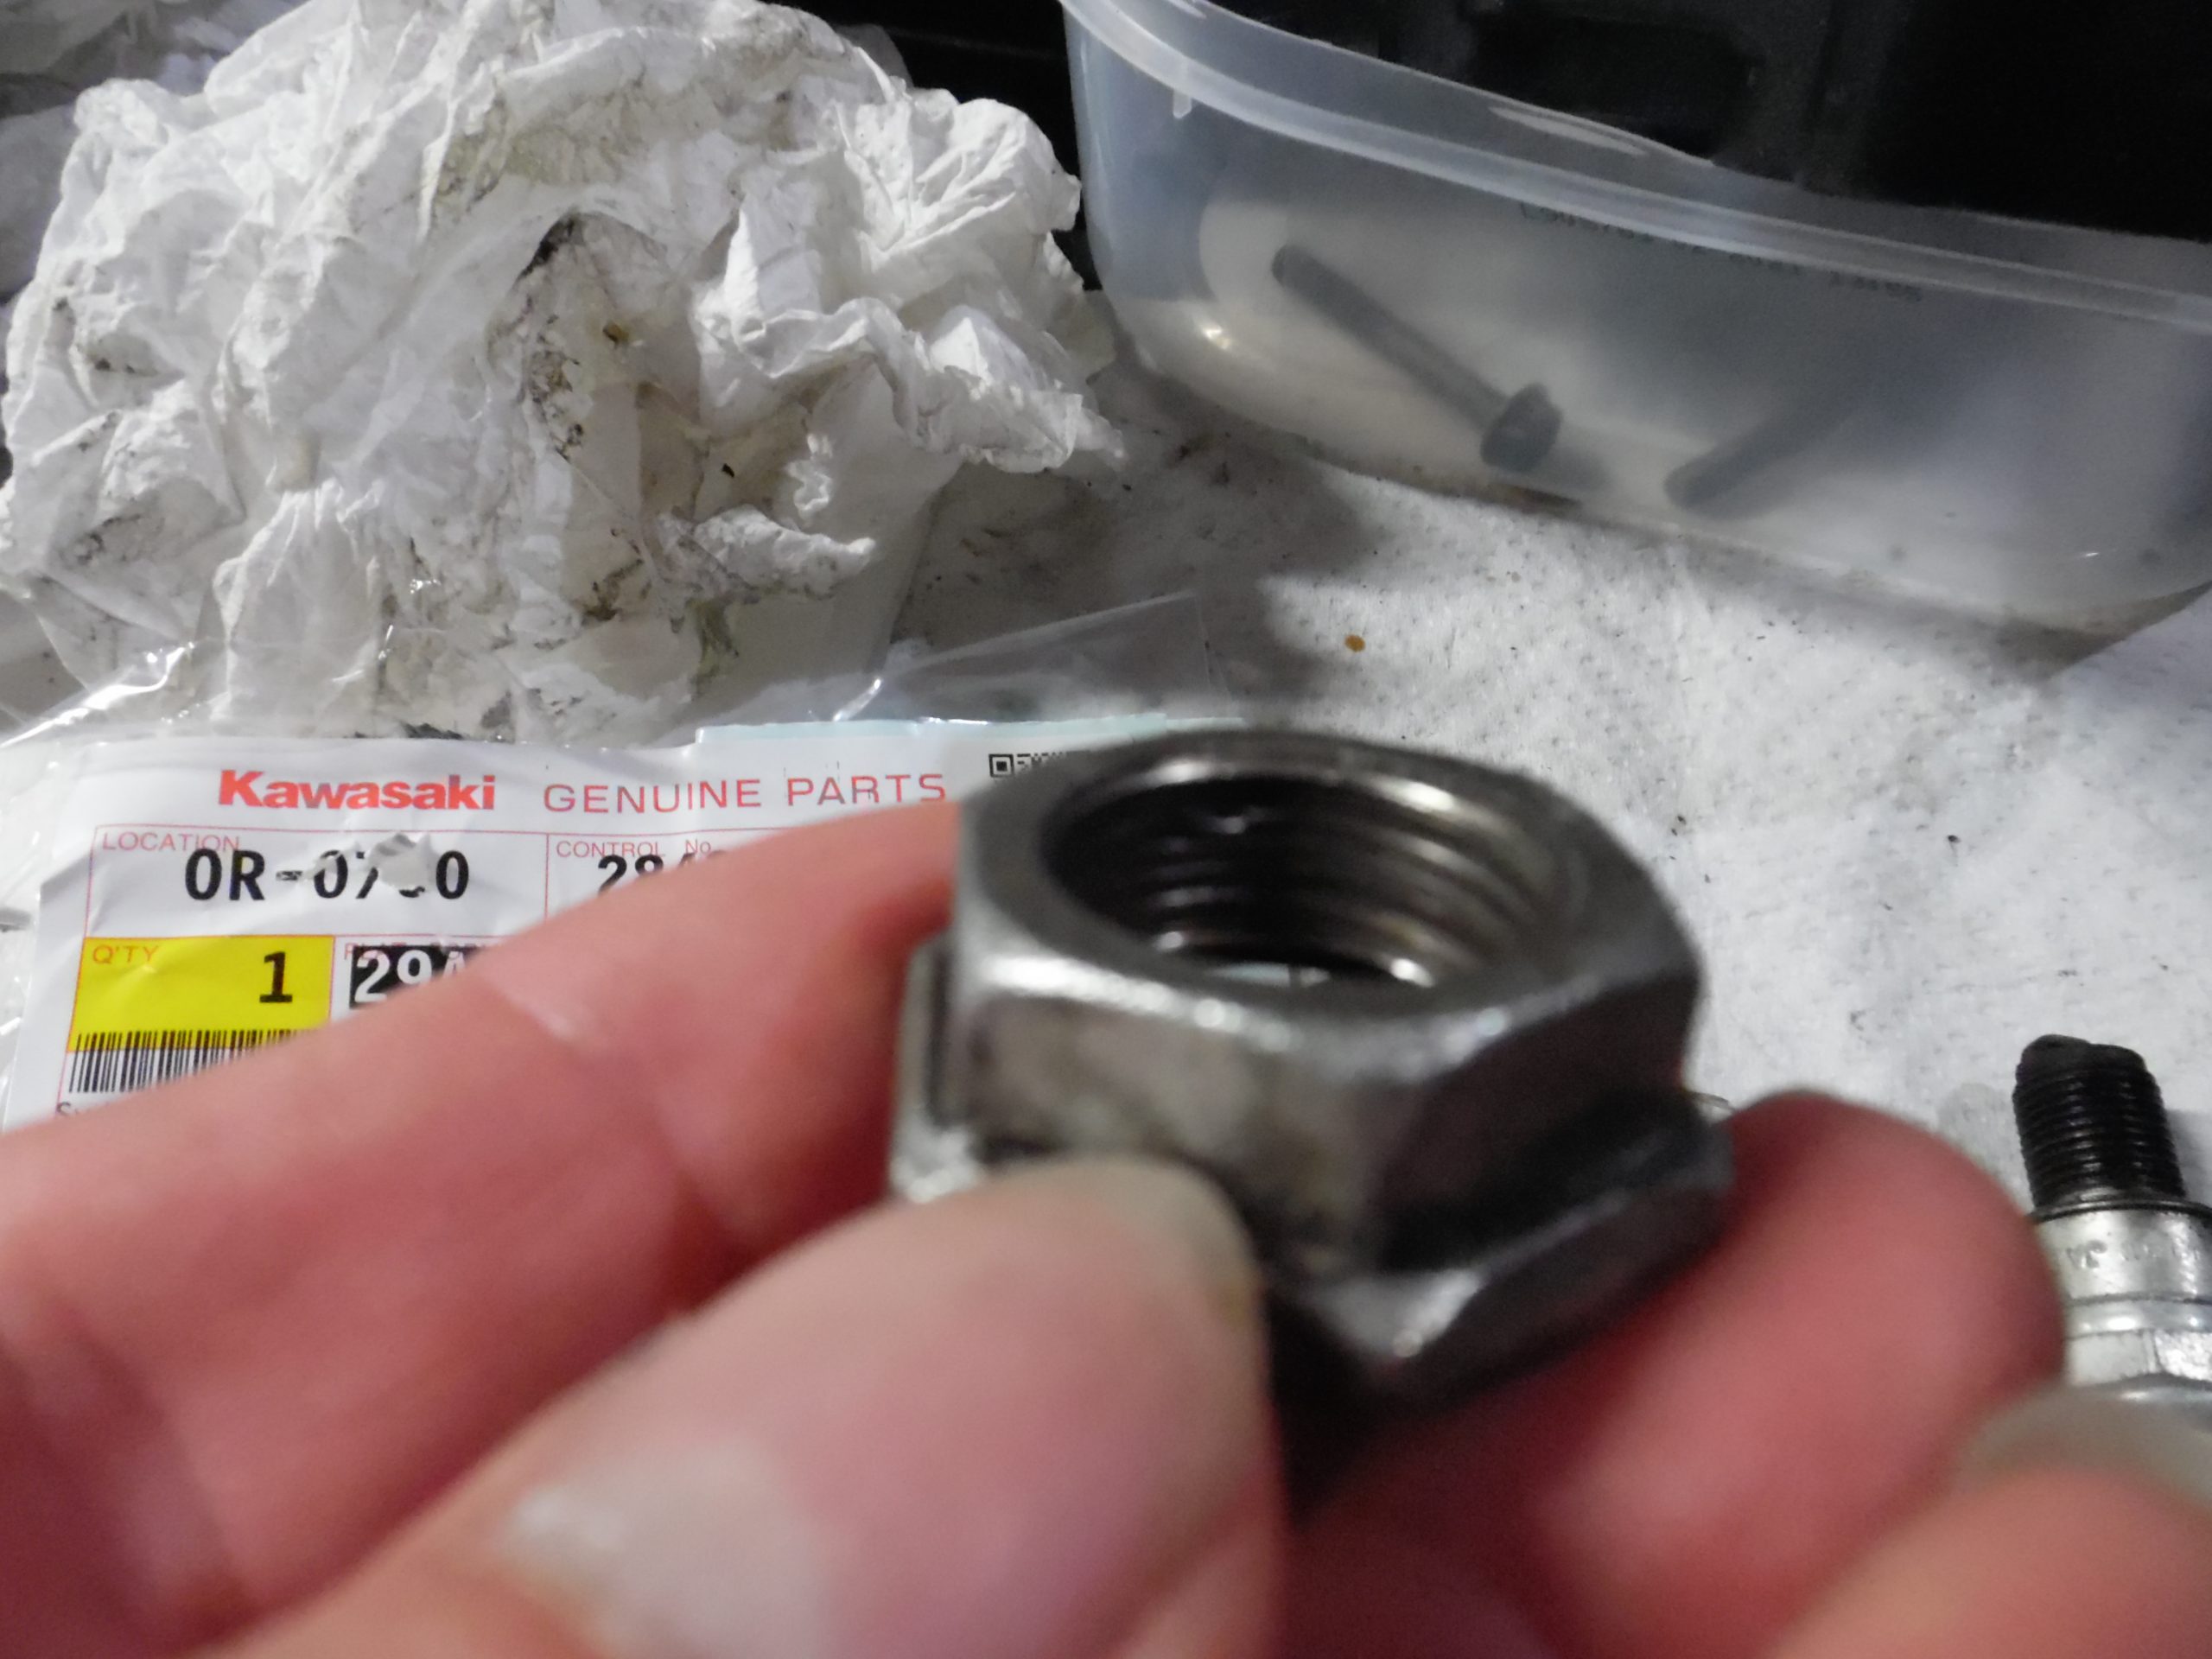
With the chain cover off, you should now be able to remove the front sprocket. it has a nut holding it on, and a while back I had to replace mine when it started rattling on the output shaft when I backed off the throttle and leaned the bike to the right.
Removing the cover
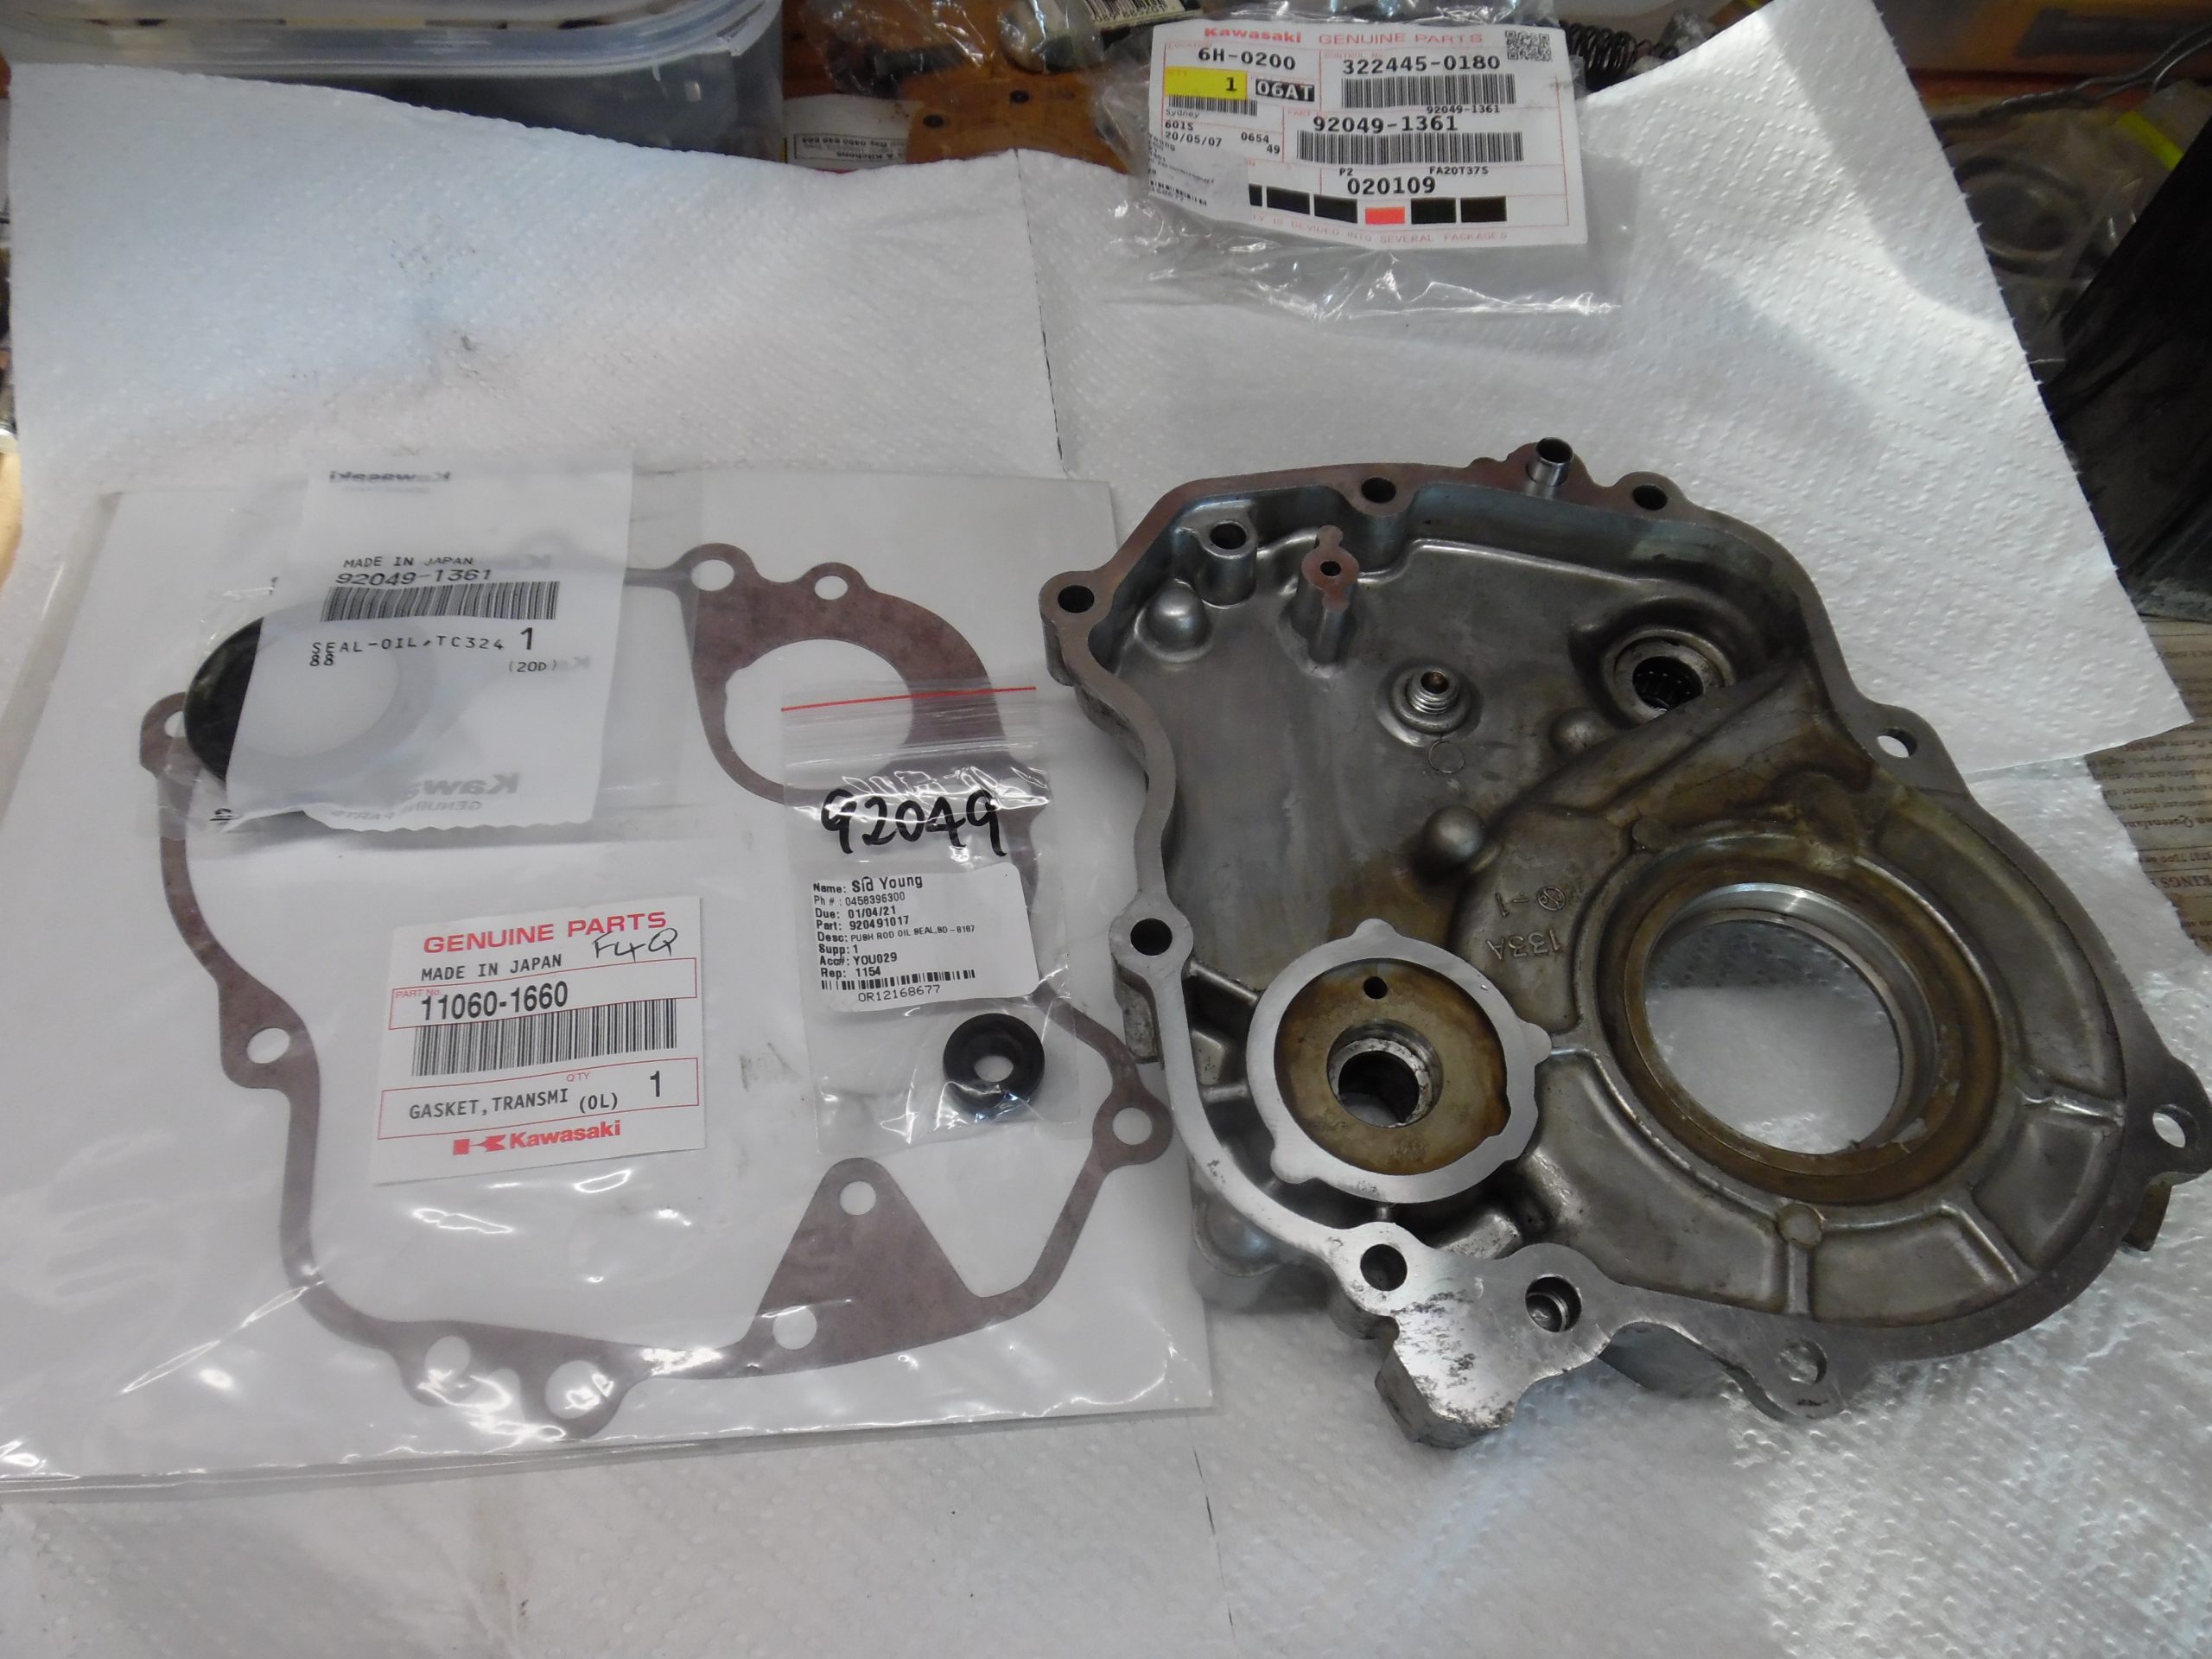
With the sprocket removed, you can start on the transmission cover, for some reason I have lost my photo of it while transferring the photos off the camera. However, I did get shots of it after I cleaned it and below is a decent example showing what you need to have on hand BEFORE you put the cover back on. The small black seal is the clutch push rod. The large seal on te left is the output shaft seal and you will need a new gasket.
Before assembling anything, clean the transmission cover so its spotless and when assembling read the service manual so you orientate everything correctly and apply any required sealant on the right spots. Generally where the case halves meet is where you may need a tiny amount of 3M sealant.
Traps for the unwary (Getting clearance)
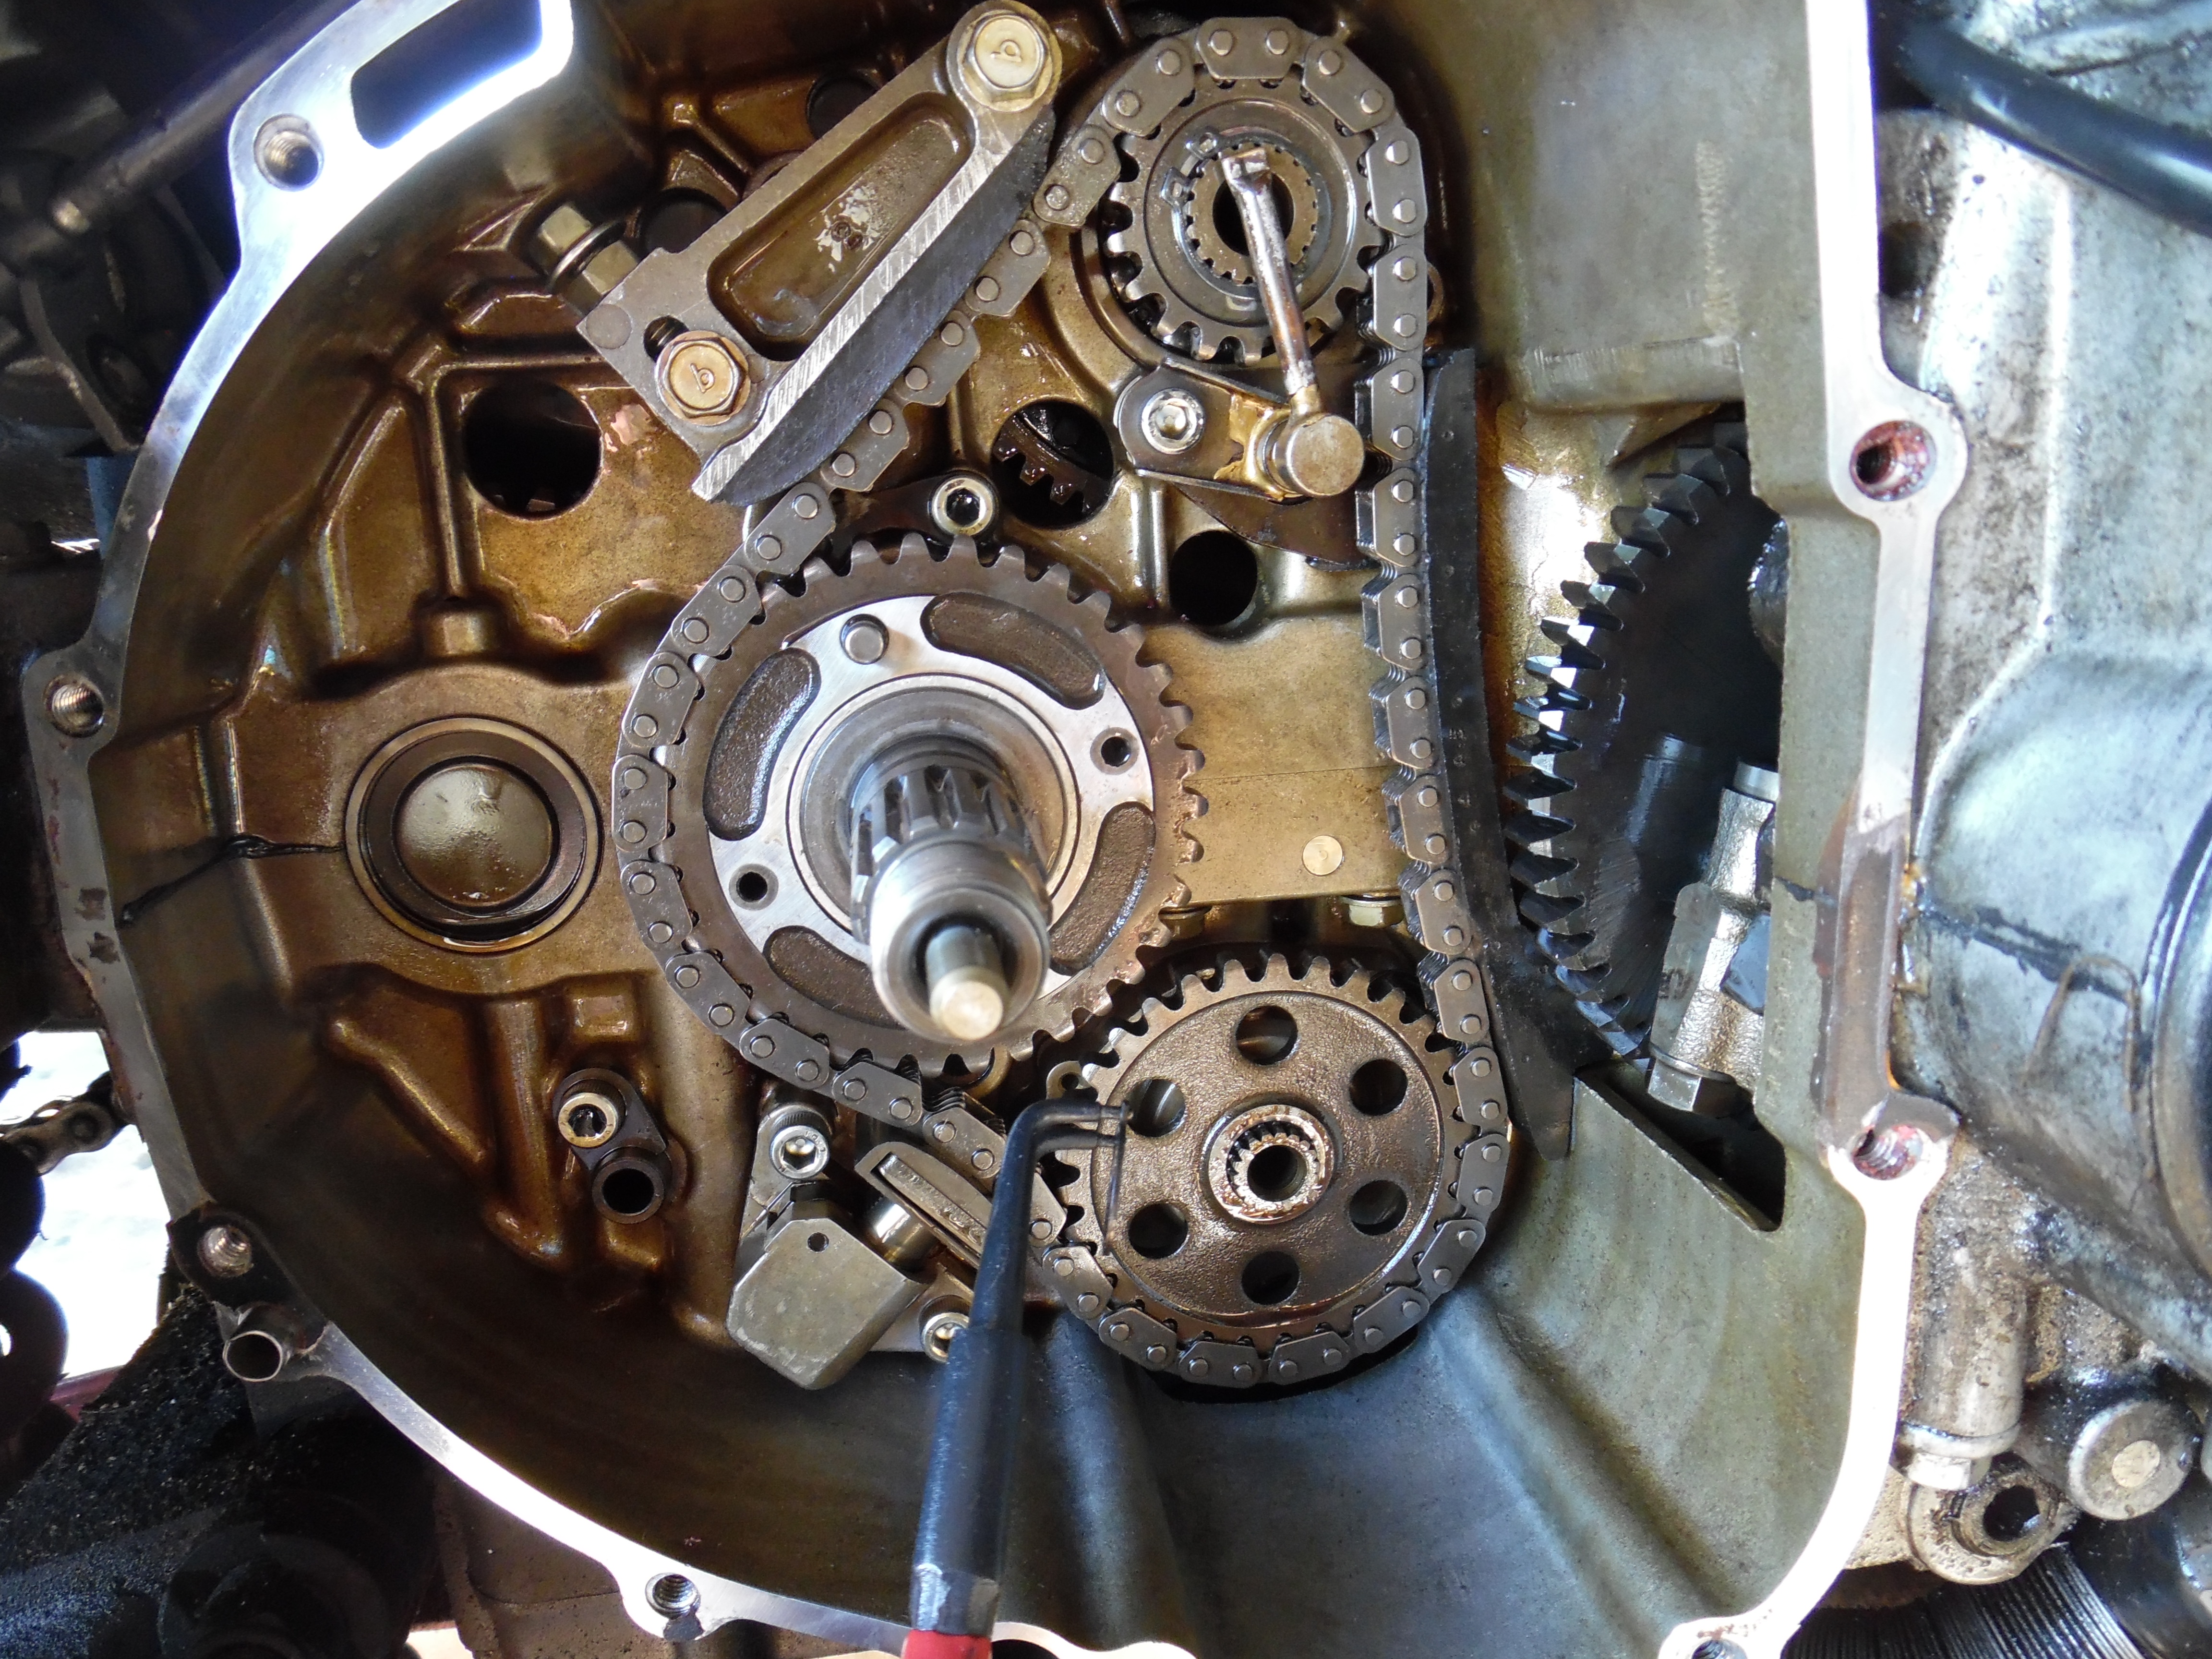
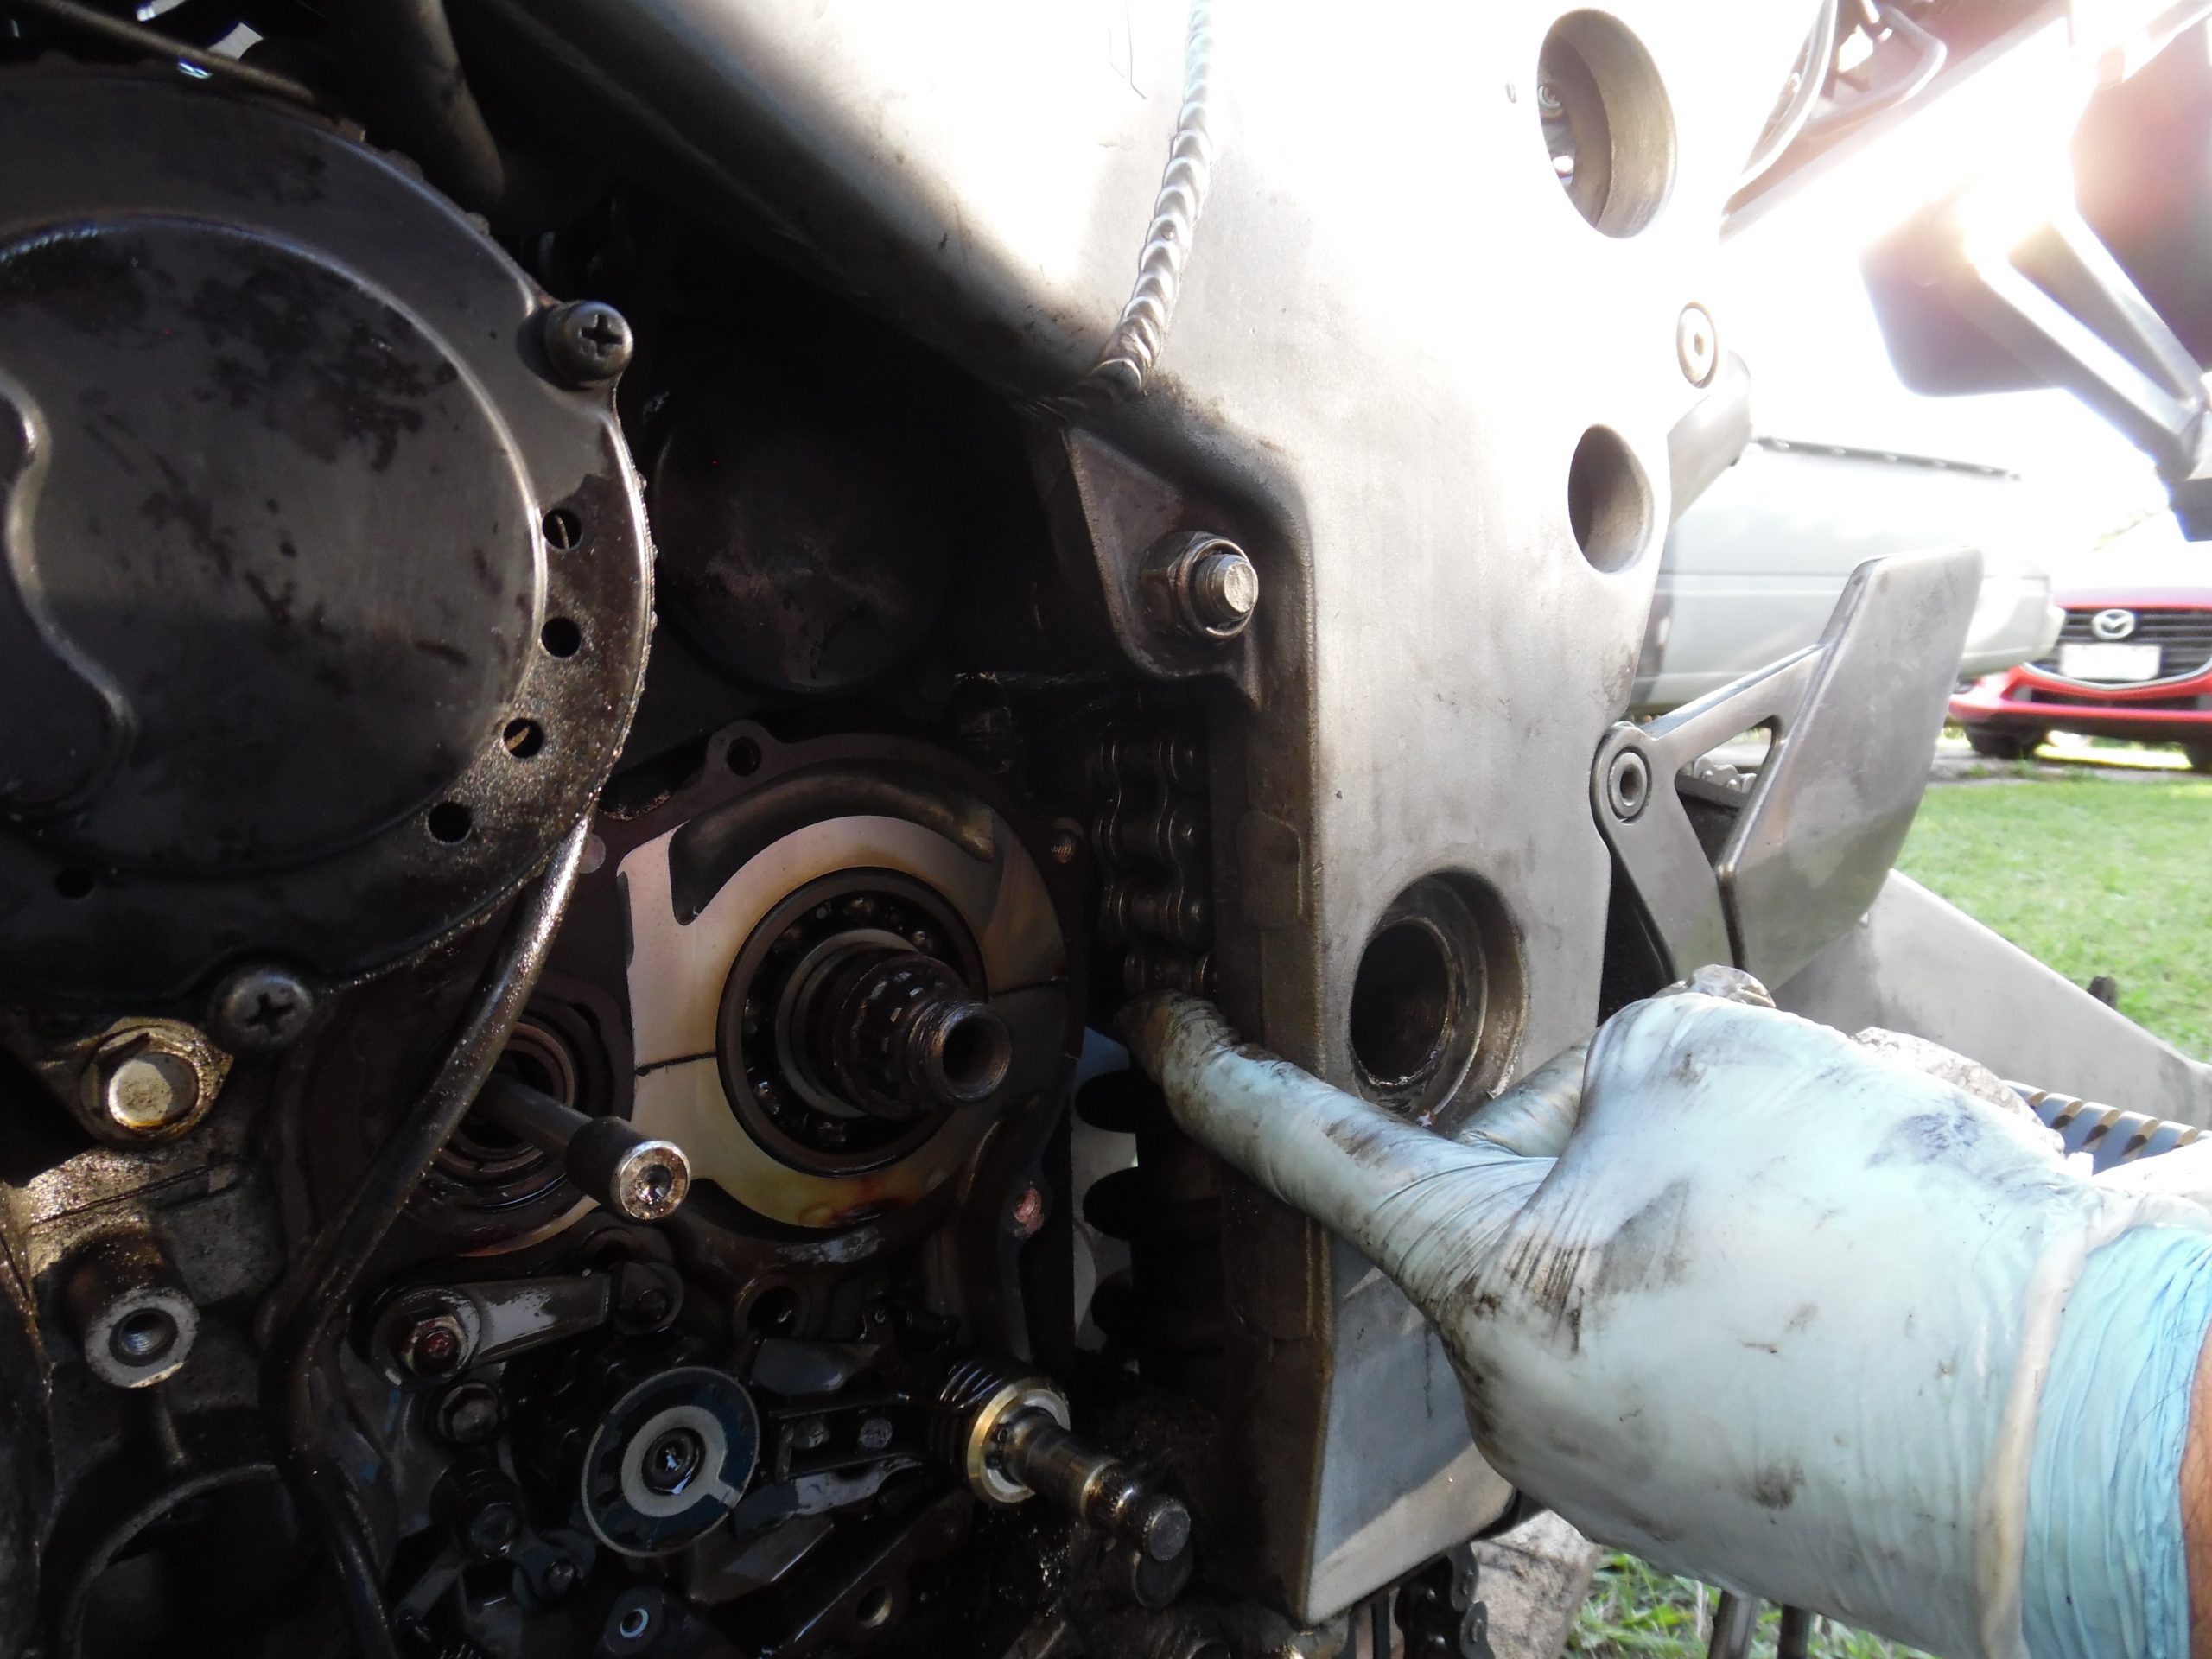
In the photo below my finger is pointing at the chain, I soon realised the chain was going to fowl. As the chain has no joining link, I needed to remove/move the swingarm back to get clearance.
If you have a joining link, you will need to remove the chain to get clearance to take the cover off.
Assembly is basically the reverse process. Observe the required Torque settings or you will strip things. Replace the oil and while your at it replace the filter as well.
Good Luck!